DP Pulveriser UK - Innovating the Future of Size Reduction
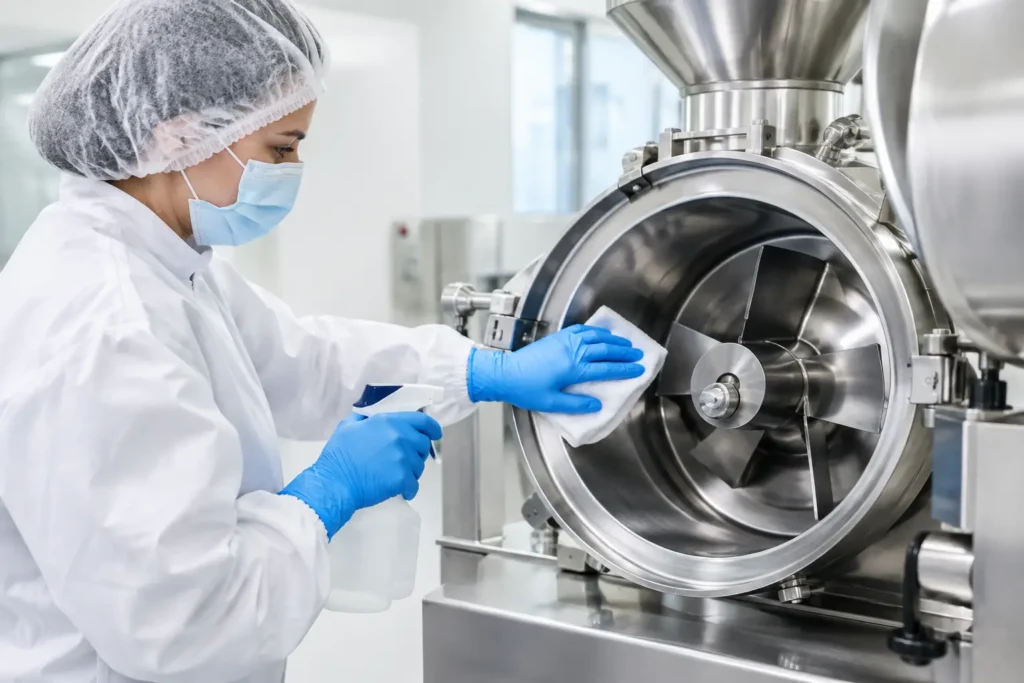
A pharmaceutical mill can appear clean while retaining enough powder in a screen aperture, discharge chute or seal groove to compromise the next batch. That is why knowing how to clean pharmaceutical mills is not simply a housekeeping exercise. It is a controlled process that supports batch integrity, prevents cross-contamination and keeps particle size reduction equipment ready for validated production.
The correct method depends on the mill design, the product formulation, the containment requirement and whether the line handles potent compounds, sensitising materials or sterile products. A cone mill processing free-flowing excipients will not demand the same cleaning approach as a jet mill handling a low-dose active pharmaceutical ingredient. In every case, the cleaning strategy must be defined by risk assessment, supported by a written procedure and verified before production resumes.
Start with the cleaning risk assessment
Cleaning should be engineered around the product and the equipment, not selected as a generic routine. The objective is to remove residues to an established acceptance limit while protecting the machine’s finish, seals, bearings and product-contact surfaces.
Begin by identifying where material can accumulate. Typical retention points include the feed hopper, inlet throat, rotor or impeller, mill chamber, screens, classifier components, discharge valve, flexible connections and dust extraction interfaces. Fine powders can also settle around clamps, gaskets and threaded fittings, particularly where poor airflow or static charge is present.
The product characteristics determine the level of difficulty. Hygroscopic powders may adhere strongly after exposure to moisture. Oily, waxy or high-fat formulations can form films that require a compatible detergent. Highly potent APIs may require contained cleaning and specialised personal protective equipment. If allergen or sensitiser control is part of the wider operation, the required carryover limits may be particularly stringent.
A risk-based approach should define the cleaning method, detergent where required, contact time, rinse quality, sampling locations and acceptance criteria. It should also set out when a routine clean is sufficient and when a full product changeover clean is required.
Isolate and make the mill safe before cleaning
No cleaning activity should begin until the mill is fully stopped, isolated and confirmed safe for access. Follow the site’s lockout and tagout procedure for electrical, pneumatic, hydraulic and any ancillary energy sources. Allow rotating parts to come to rest, isolate the feed and discharge systems, and release trapped pressure where pneumatic conveying or compressed air is used.
Operators should wear PPE that matches both the cleaning chemical and the material previously processed. This may include gloves, eye protection, respiratory protection and disposable protective clothing. For potent materials, cleaning may need to take place within a contained booth or through a closed transfer and wash arrangement.
Before opening the machine, remove as much residual powder as possible using an approved industrial vacuum with suitable filtration and containment. Do not use compressed air to blow down a pharmaceutical mill unless the procedure explicitly permits it. Air jets can aerosolise product, spread dust into inaccessible areas and create an uncontrolled exposure risk.
How to clean pharmaceutical mills step by step
A reliable cleaning sequence moves from dry product removal to detailed cleaning, rinsing and verification. The exact steps must follow the approved equipment-specific SOP, but the operating principle is consistent across cone mills, pin mills, hammer mills and many classifier mill configurations.
1. Remove product residues dry
Disassemble only the components specified in the procedure. This may include the hopper, screen, rotor, mill chamber cover, discharge chute, flexible connectors and collection vessel. Use purpose-designated brushes, scrapers and vacuum attachments that will not shed fibres or damage polished stainless-steel surfaces.
Dry cleaning is often the preferred first stage because it limits the creation of wet residues and reduces the burden on subsequent washing. It is particularly useful for water-sensitive products and equipment that cannot be readily wet-cleaned. Capture removed powder as controlled waste unless the batch record permits recovery.
2. Wash product-contact parts where required
For wet cleaning, use purified water, detergent solution or another validated cleaning agent at the concentration and temperature specified by the SOP. Detergent selection matters. A chemical that removes oily residue effectively may be unsuitable for a sensitive elastomer seal or may leave a residue that is difficult to rinse.
Apply the solution using a controlled method, such as manual wiping, low-pressure rinsing or a dedicated wash system. Avoid directing high-pressure water at bearings, instrument housings, electrical enclosures or areas not designed for washdown. Jet mills and air classifier mills require particular care around air handling assemblies, classifiers and filter interfaces.
Clean all dismantled product-contact parts separately, paying close attention to screen perforations, rotor surfaces, gasket seats and corners where powder can bridge. If a component is damaged, corroded or difficult to clean repeatedly, replacement may be more effective than extending cleaning time.
3. Rinse and dry completely
Rinse away detergent and loosened residue using the approved quality of water. Where the validated process requires final rinsing with purified water or water for injection, that requirement must be followed precisely. Residual detergent can affect product quality just as readily as residual active material.
Drying is not optional. Moisture left in a mill can cause agglomeration, corrosion, microbial risk or inconsistent processing at the next start-up. Use lint-free wipes, filtered air where approved, or controlled drying cabinets for removable components. Reassemble only when every required surface is dry and the equipment is free from fibres, tools and cleaning materials.
4. Reassemble and inspect the machine
Reassemble the mill according to the manufacturer’s specified configuration. Confirm that screens are correctly seated, clamps are secure, gaskets are intact and the rotor or impeller rotates freely by hand where safe to do so. Incorrect assembly can create metal-to-metal contact, vibration, poor particle size control or an unplanned shutdown.
A visual inspection should cover all accessible product-contact surfaces under adequate lighting. The inspection is not a substitute for analytical verification, but it remains an essential first control. A visibly clean machine is the minimum standard, not the final proof of cleanliness.
Verify cleaning rather than relying on appearance
Pharmaceutical cleaning must be demonstrable. Validation establishes that the defined procedure consistently reduces product residues, detergent residues and, where relevant, microbial contamination to acceptable limits. Verification then confirms that each production changeover has been completed in line with that validated process.
Swab sampling is useful for targeted areas such as the screen seat, discharge port, gasket groove and rotor face. Rinse sampling may be appropriate for complex or inaccessible internal surfaces. The chosen method should reflect the recovery characteristics of the residue, the geometry of the mill and the analytical sensitivity required.
Cleaning acceptance limits are commonly based on toxicological and product-specific data, not a one-size-fits-all visual standard. For facilities processing potent compounds, low-dose formulations or multiple products on shared equipment, limits and sampling plans should be established with quality assurance, process development and toxicology input.
Document each activity in the equipment log or batch record: the previous product, cleaning method, detergent batch where applicable, operator, inspection result, sampling status and line release. Clear records provide traceability and reveal recurring issues, such as residue repeatedly found behind a particular seal or within a difficult-to-access discharge connection.
Design choices that make mill cleaning more effective
The easiest mill to clean is one designed for hygienic access. Smooth, polished product-contact surfaces, minimal crevices, quick-release clamps, removable screens and tool-free disassembly reduce cleaning time and lower the risk of missed residue. Product contact materials should also be compatible with both the formulation and the validated cleaning agents.
For high-containment applications, split butterfly valves, contained discharge arrangements and engineered connections can reduce operator exposure during dismantling and cleaning. In larger processing lines, integrating the mill with dust collection, conveying and downstream handling equipment demands a whole-system view. Cleaning only the milling chamber is inadequate if residue remains in transfer lines, filters or collection vessels.
There is a practical trade-off between rapid changeovers and the depth of dismantling required. A mill configured for frequent campaign changes may justify additional quick-release components and access points. A dedicated line handling one product may favour a simpler configuration, provided it remains inspectable and maintainable.
Common cleaning failures to prevent
The most frequent failures are procedural rather than chemical. Rushing the dry clean, overlooking flexible hoses, reusing worn brushes, fitting the wrong screen after cleaning, or releasing equipment before it is fully dry can all undermine a well-written SOP. So can treating seals as minor components. A degraded gasket can trap residue, shed particles and reduce containment performance.
Cleaning frequency should also reflect operating reality. Fine, electrostatically charged powders can build up faster than expected, while sticky formulations may require interim cleaning during an extended campaign. Trend inspection and swab data rather than assuming that a fixed interval remains suitable indefinitely.
A well-engineered pharmaceutical milling system should support consistent cleaning as well as precise particle size reduction. When equipment access, cleaning validation and operator practice are considered together, changeovers become more predictable and the mill remains a controlled part of the manufacturing process rather than a hidden source of batch risk.